Book an Appointment in NavigateTXST

TXST student meeting with advisor

Need to meet with a faculty member, advisor, or staff member in a specific department? Look no further than NavigateTXST!

Here's how to schedule your appointment:

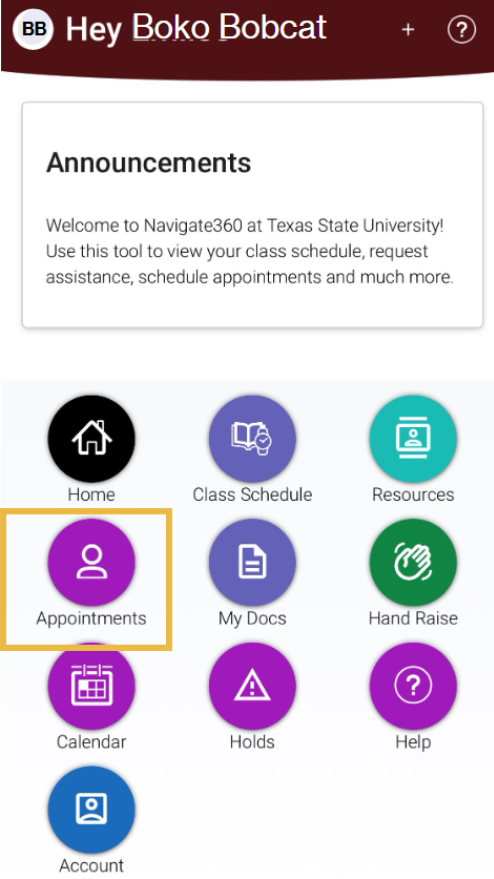
  1. Download the NavigateTXST Student App or access the desktop site.
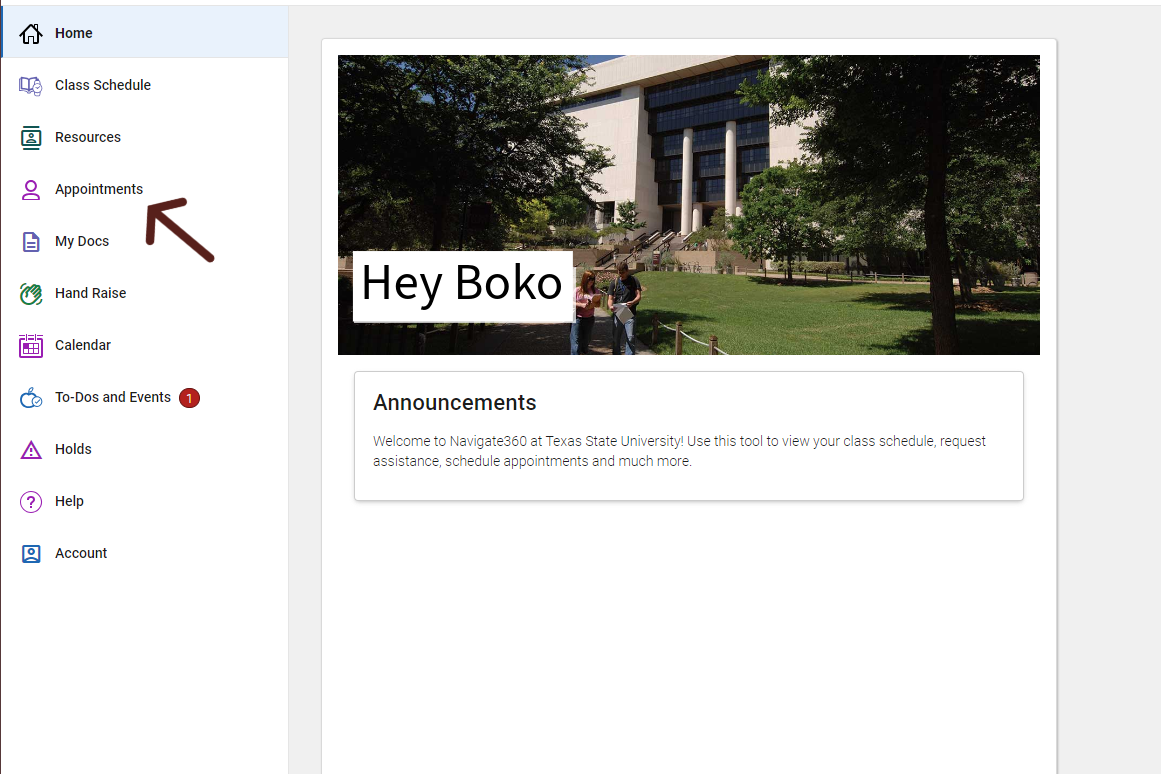
  2. Open the "Appointments" tab.
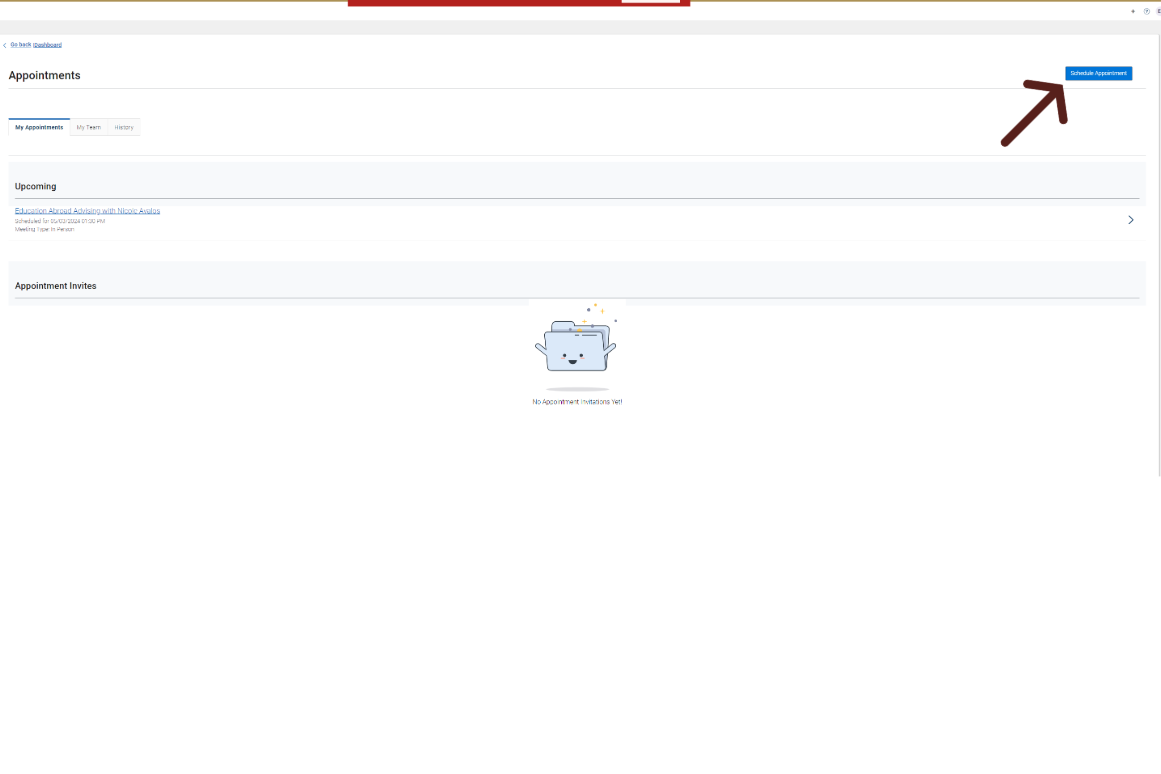
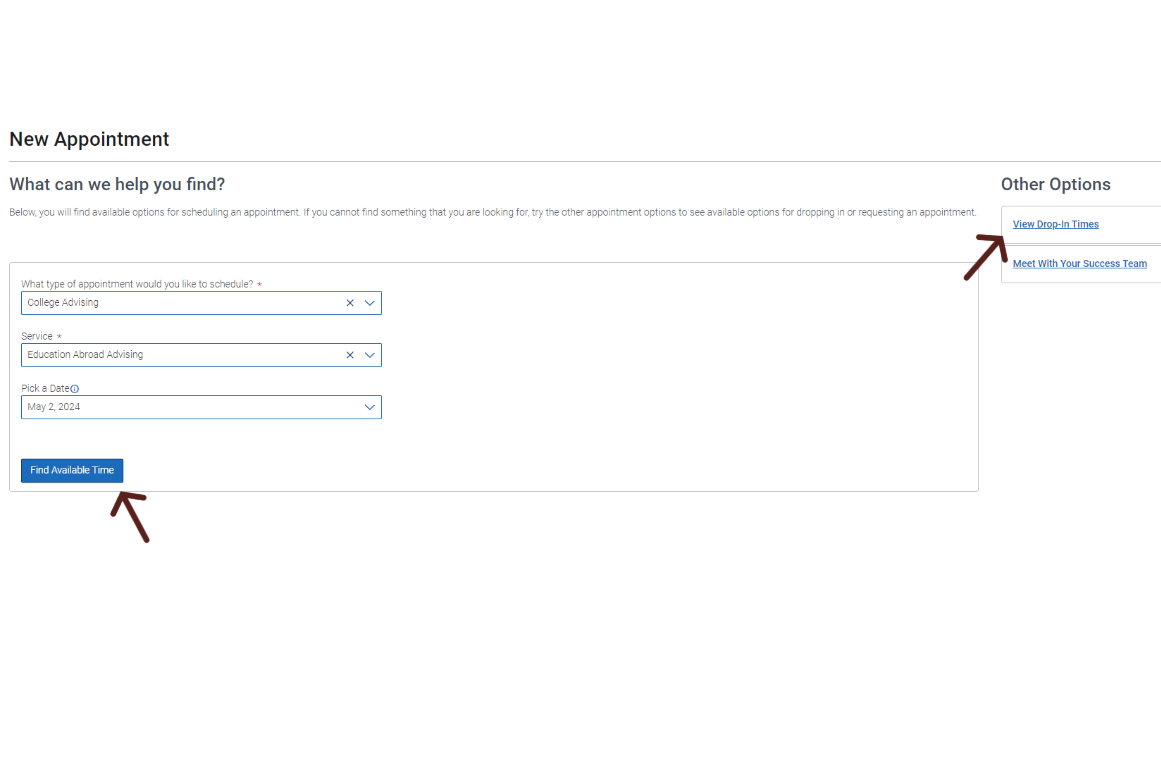
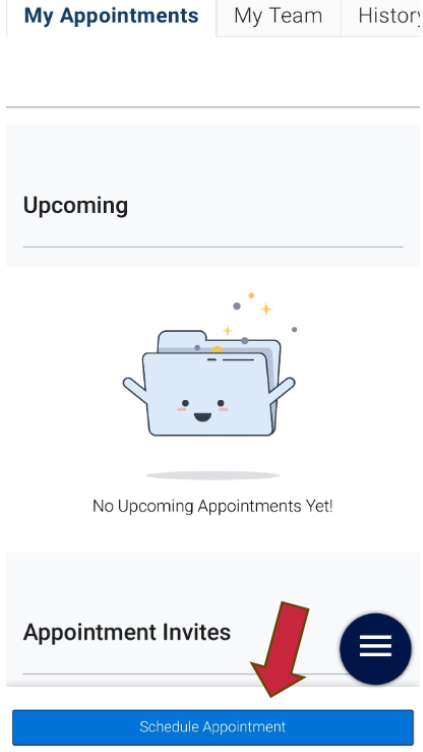
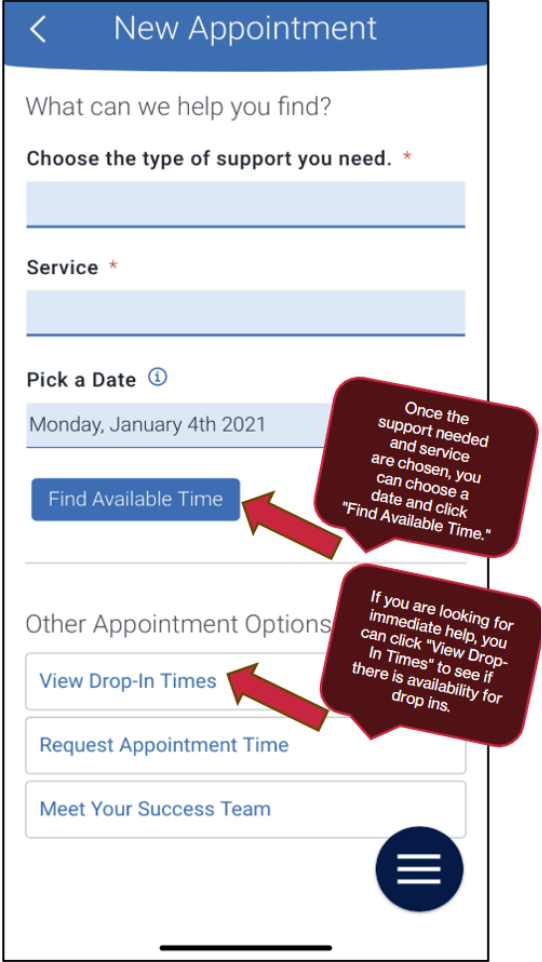
  3. Browse or search for the department and reason you are wanting to meet with.
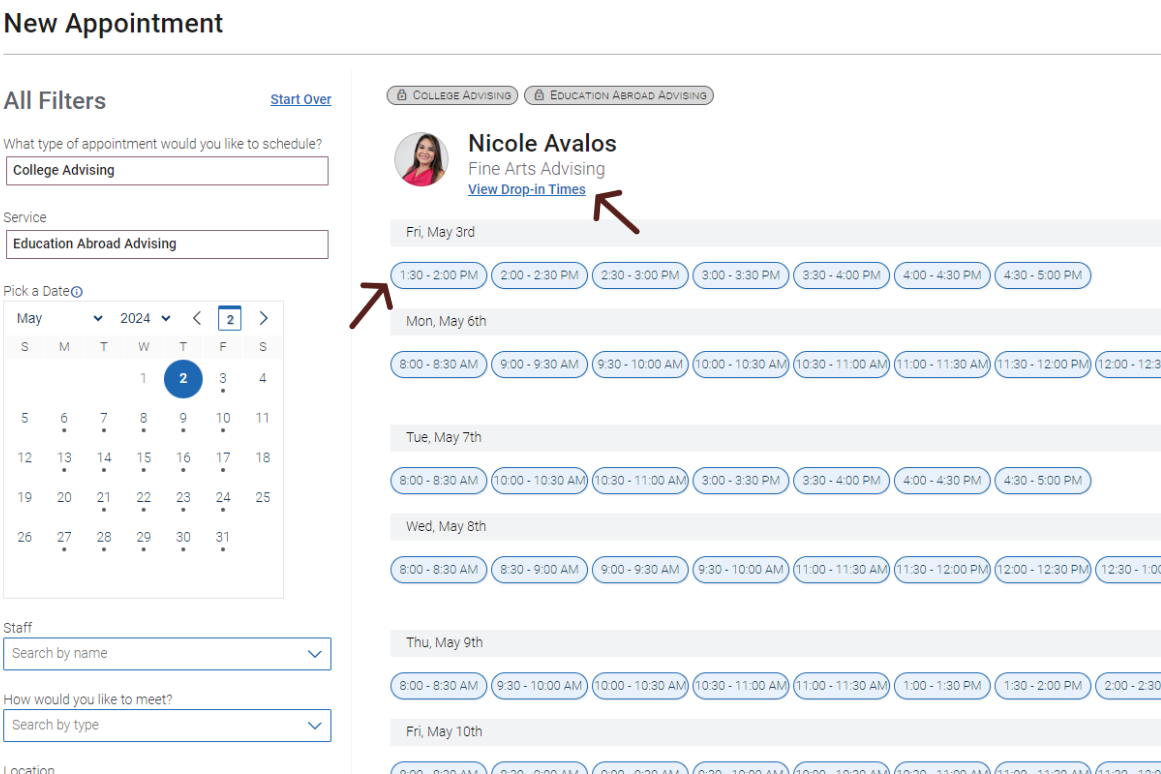
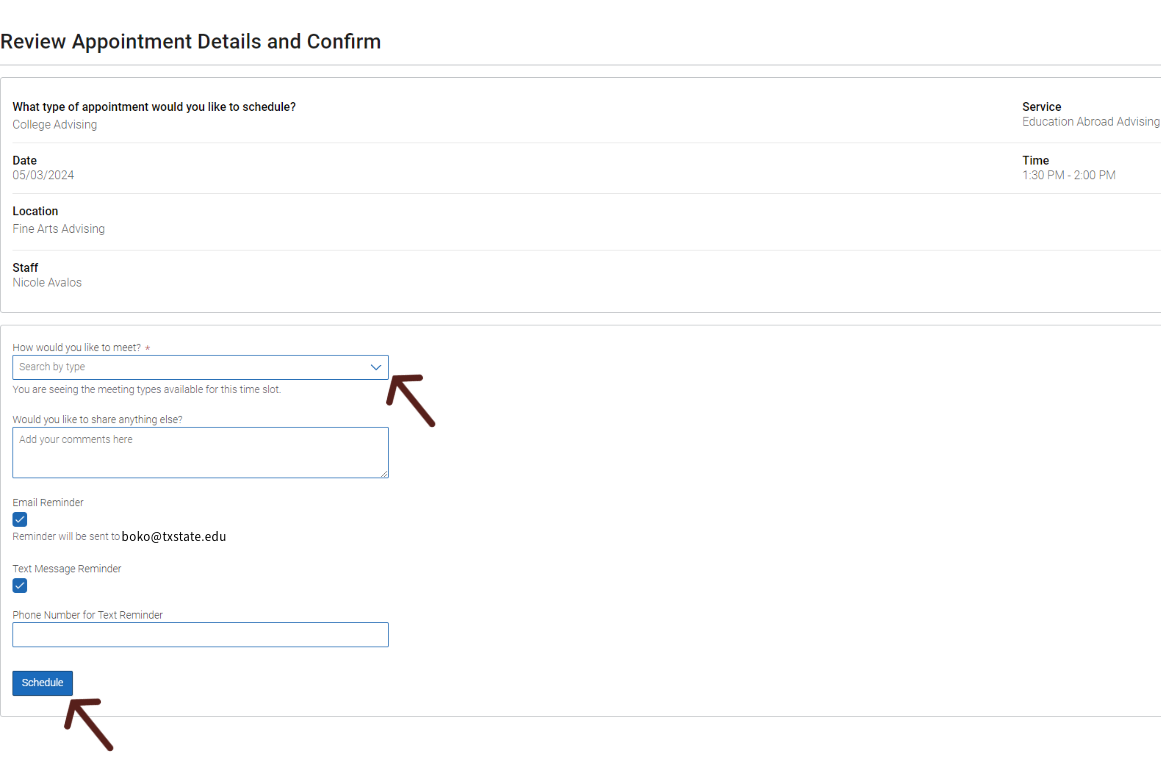
  4. View available appointment times. Select a time that works for you.
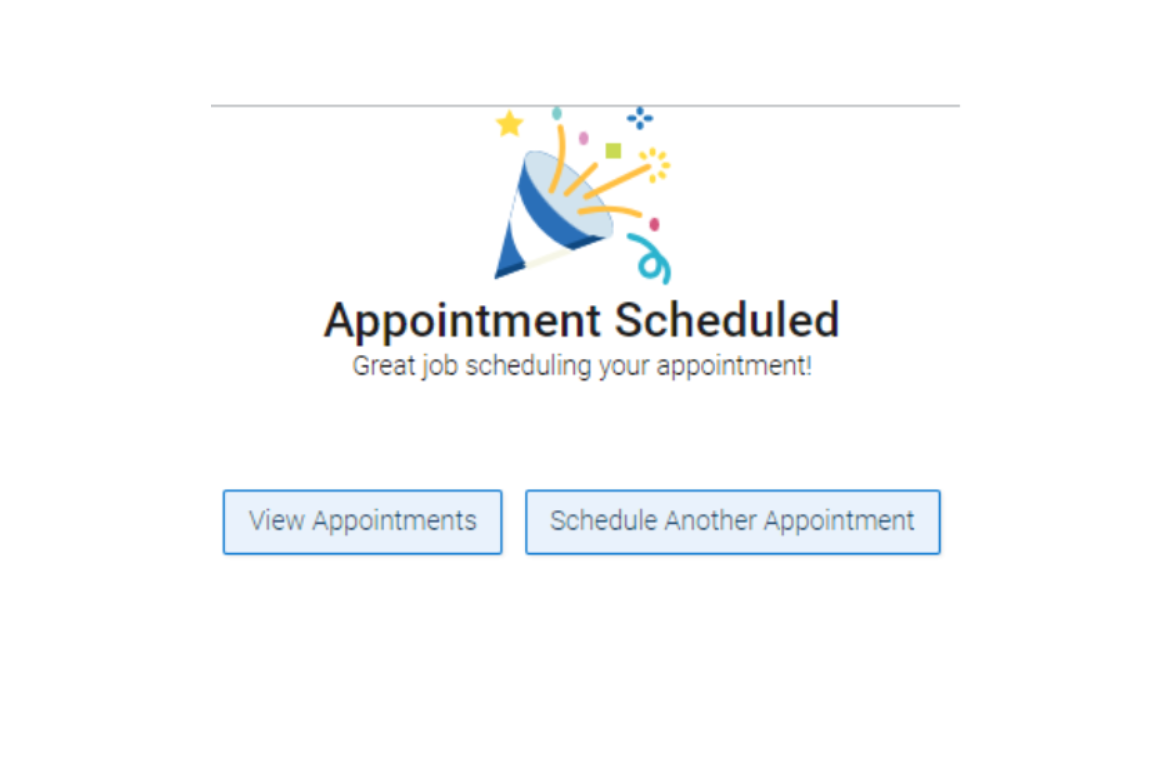
  5. Confirm your appointment. You'll receive a notification to confirm the details. 

Book An Appointment via Desktop

Step 1: Getting Started with Appointments on NavigateTXST Desktop

Ready to book your appointment on the desktop version of NavigateTXST?  It's simple! 

Just click on the "Appointments" section to get started. This will take you to the appointment scheduling interface.

Home screen of EAB Navigate webpage

Step 2: Your Appointment Hub

The NavigateTXST Student App keeps you organized and in control of your appointments.  

This screen is your one-stop shop to view all your scheduled meetings, both past and upcoming. Any appointments booked for you by an advisor or staff member will also be listed here.

To schedule a new appointment yourself, simply click the "Schedule An Appointment" button.

Screenshot of main Appointments landing page on Navigate desktop.

Step 3: Starting Your Appointment Booking in NavigateTXST

The “New Appointment” page will open after you have selected “Schedule an Appointment.” 

  • Under the first drop-down, choose the type of appointment you wish to schedule (e.g. Advising, Tutoring or Academic Engagement)
  • Under the the next drop-down, select the area most appropriate for the reason for your appointment. This will help you get to the right person/people to assist you.
  • The last drop-down will ask you set the date for the appointment. Navigate will also give you dates/times available past the set day. When you are done, hit the blue "Find Available Time" button once you are done.

NOTE: If you are looking for more immediate assistance, click “View Drop-in Times” to see if their is open availability. This will depend on service and department. 

Appointment Scheduling Screen on Navigate Desktop

Step 4: Navigating Your Appointment Options in NavigateTXST

At the top of the page, you will see the options you chose on the previous page. These options can’t be changed unless you select the Start Over link. 

On the left is a filter panel that also shows the filters chosen, a calendar to pick a date for the appointment, and more filters to narrow appointment options. 

You can narrow by:

  • Staff name
  • How you would like to meet
  • Location
  • Course 

The main panel on the right side updates to reflect filtering automatically. The main section will automatically update to show appointments that match your filters and chosen staff member. 

Once you choose an appointment time, it will take you to the next page where you will review your scheduling options. 

NOTE: Remember, only staff who have set up their availability in NavigateTXST will show appointment options.

Screenshot of Appointment Availability page on Navigate Desktop

Step 5: Review Appointment Details

Once you've found a suitable time slot, clicking it will open the "Review Details" page. Here's what you'll see:

  • Meeting Type: This is a required field. If the staff member offers multiple options (in-person, virtual, etc.), you can choose your preference here.
  • Filter Flexibility: If your desired meeting type isn't initially available, you can head back to the filter panel and adjust your search to see slots for that specific type.
  • Adding a Comment: Feel free to include a brief comment for the staff member in the designated section.
  • Reminders: Choose email or text reminders (or both) to ensure you don't miss your appointment.
  • Confirmation: Once everything looks good, click the "Schedule" button.
Appointment Confirmation Screen on Navigate Desktop

Step 6: Confirmation & Email

If your appointment is successfully booked, you'll see a confirmation message along with two options:

  • View Appointments: This allows you to see your scheduled appointments.
  • Schedule Another Appointment: This option lets you book another appointment if needed.

Check your email! Review the email confirmation you receive for any special instructions, such as how to join a virtual appointment. 

Appointment Confirmation Screen on Navigate Desktop

Book An Appointment via App

Step 1: Select "Appointments"

Home screen of EAB Navigate App.

Step 2: Select "Schedule Appointment"

Screenshot of main Appointments landing page on Navigate App.

Step 3: Select appropriate fields from drop down menus, then select "Find Available Time."

  1. Find an Appointment Slot: Look for blue bubbles indicating available times with the staff member. Tap one to choose that date and time.
  2. Choose Meeting Details: Scroll down to pick your preferred meeting format (in-person, online, etc.) and if you want appointment reminders. Navigate will show details about each option.
  3. Review and Schedule: Double-check your selections for date, time, meeting format, and reminders. Once confirmed, tap the blue "Schedule" button at the bottom to finalize your appointment.
 Appointment Scheduling Screen on Navigate App

Step 4: Your appointment is set. Check your email!

Appointment Confirmation Screen on Navigate App